If you’re a fan of tasty and fragrant meals baked in a backyard pizza oven, but you still don’t have your own oven – it’s time to change it! Learning how to build a pizza oven in your garden is – despite appearances – quite easy. How to build an outdoor oven from scratch? Read this article to see all the necessary information!
How to build a pizza oven step by step?
The process of building consists of several stages. We’ll do our best to clarify all the important things in a short and accessible form.
Choose the best location
The first thing you should actually do is to choose the best location for the pizza oven. You need to take a few aspects into account. Above all, make sure that your oven will be placed far enough from trees, bushes, and all kinds of greenery. Keeping your brick pizza oven away will keep you safe and minimise the fire hazard.
Choose the oven’s type and design
It is obvious that the stage of building should always be preceded by the stage of deciding on the oven’s design and type. Determine the type of the oven – you can choose from several types: wood fired oven, gas outdoor pizza oven, coal outdoor pizza oven or stainless-steel outdoor pizza oven. You decide how you want your perfect oven to be done! You decide about its feature size and shape. The most important thing is that the oven has to be functional, aesthetically interesting, and tailored to your preferences.
Carry out measurements
Carrying out measurements before laying the first block of bricks is crucial. You need to find a centre and make a mark to know which “point” is the right place for putting the first block. Think twice – both the small and the big ovens have their own advantages and disadvantages. For example, if you want to prepare more pizzas at once, you can do it in a bigger oven, however, you need to reckon with the fact that big ovens take longer to heat-up. It is always something for something.
Buy the highest quality necessary materials
The next step after determining your future oven’s design, size, and shape is choosing the finest refractory materials. We recommend investing in an outdoor pizza oven kit, which is an absolutely great thing filled with a range of products needed for building your own wood burning pizza oven. It’s worth buying a wood fired pizza oven kit including fire bricks, arch bricks, heatproof screed, ceramic fibre board, ceramic fibre adhesive, ceramic fibre blankets, outdoor oven cements, and wire mesh. You will find a great quality outdoor pizza oven kit on the website https://shop.vitcas.com/outdoor-pizza-oven-kit.html.
Lay the first block
The oven’s base may consist of breeze blocks, bricks or concrete blocks. No matter which materials you decide to use, you need to make sure that the base of your future outdoor pizza oven will be strong enough to support the weight of your whole oven. Suppose you want to use bricks. You need to lay the first block of bricks in a chosen location, at the centre of the foundation. To connect bricks, you should use cement from the previously mentioned outdoor pizza oven kit.
Test space
Later, you ought to stack your base’s blocks to make sure they fit into the chosen space. Don’t use any adhesive – your aim is provisionally putting a base together. The main purpose of this stage is to ensure that the location you selected is the right one.
Cut blocks
One of the stages of the building process is cutting the blocks in accordance with the design specifications. You can use a speed square – it will make marking off the place in which you want to make the cuts possible. You can also use an angle grinder to score the blocks. And finally, you can split the blocks with the use of a chisel.
Layer and level blocks
Your goal at this stage is a solid base. You can achieve your goal thanks to precision and accuracy. You need to make sure that the first layer of your oven is even – then there’s a good chance that all the other layers will be even, too. Get everything checked and then proceed to the stage of applying landscape adhesive.
Apply landscape adhesive in the centre of each single block. Why? Because you don’t want the adhesive to gush out over the sides! Use two lines of adhesive instead of just one line. Trust the process. Thanks to your accuracy and following our advice, your outdoor oven won’t topple.
Set the capstone
The next stage of the process is placing the capstone – the base of your DIY pizza oven. Build to a height that satisfies you, and then add adhesive at the very top. Later on, set the capstone in place. Again, you need to be sure everything’s even.
Lay the floor of the oven
The next step involves laying out the bricks on the capstone and mixing the mortar. Make sure to use the mortar which can join your chosen fire bricks. We recommend refractory mortar made of cement, sand, fireclay, and calcium aluminate. Use just a little mortar to cover the bricks. Too much isn’t good. It is a good practice to stop at this point and to let everything dry – one day or two will be enough.
Build a dome
Creating a mould that allows you to build a dome is another step of the process. You need to do it before you start laying other bricks. You ought to draw the shape of the dome on the plywood. Then cut it using a jigsaw. Repeat the action (you need two pieces of plywood) and then attach the two mentioned pieces with a few screws before cutting. Cut them as one piece – you want to be sure that the curve matches.
Again, you need to use mortar. This time, apply thick layers – this will help make the dome’s shape rounded. The only exceptions are places closer to the top. It might be necessary to cut bricks to the desired dimensions. At the stage of building a dome, you need to remember about leaving a gap for your future oven’s chimney at the top of the dome. Let the mortar dry for at least three days.
Remove the mould and sand mortar
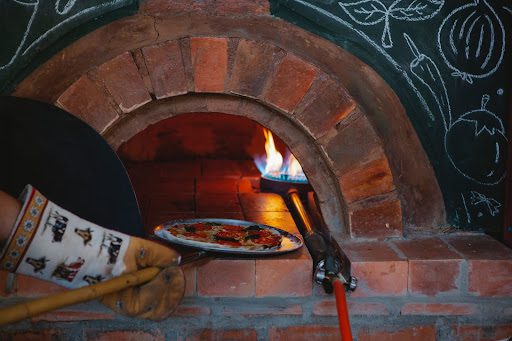
One of the last steps is removing the mould used on the fire brick. If there are any screws or nails around your brick oven, remove them too. Actually, you should clean everything, including the remains of sand. What you need is a clean and smooth surface, especially along the oven floor. Make your whole oven clean (you can use a damp cloth). Get rid of debris – scrape it away. Make sure that the oven (both the inside and the outside) couldn’t be cleaner, and… finally start preparing pizzas and other meals!

Summary
We hope that our guide will help you build your desired oven quickly and seamlessly. You can also see DIY outdoor oven plans on the Internet. You can save up to a few hundred dollars by building an oven on your own. Just follow the good tips given and enjoy good-smelling and delicious food taken right from your own DIY pizza oven in your backyard! Doesn’t that sound like fun?